A new hardwood floor feels like a clean slate. The color runs true, the finish gleams, and even the sound underfoot is tight and reassuring. Keeping that feeling for years takes more than a welcome mat and good intentions. Wood is a living material long after it’s milled. It moves with seasons, reacts to light, and remembers every grit of sand dragged across it. I’ve installed, refinished, and nursed along more floors than I can count, and the homes that keep their hardwood looking great share one thing in common: daily habits that respect how wood behaves.
What follows is not a one-size checklist. Oak in a dry mountain climate is not the same animal as maple in a coastal bungalow, and site-finished floors have different needs than factory-finished planks. Still, the principles hold across species and finishes. If you understand why floors age, you can slow that clock to a crawl.
What really ages hardwood
Most floors don’t fail from one big event. They wear down through small, repeatable insults. Grit acts like sandpaper. Water seeps in through edges and swells boards. Sunlight bakes certain areas and bleaches others. Furniture legs grind a finish down to bare wood. Pets add texture you never asked for. On top of that, the building’s humidity swings push boards to expand and contract. The finish is your sacrificial layer, and when it thins, wood fibers start taking the hit.
The goal is not to baby the floor. It’s to keep contaminants off the surface, control the environment, and renew the finish before the wood itself starts suffering. When you get those three right, even busy households can push refinish timelines by many years.
Cleaning that actually preserves the finish
I’ve seen well-meaning owners dull a floor in six months with the wrong routine. They mop like it’s tile, use waxy “glow” products, or park a spinning brush on a polyurethane finish. If you want the short version, think dry removal first, damp maintenance second, periodic deep care last.
Dry cleaning matters most. A soft-bristle broom or static dust mop picks up grit before it scores the finish. A good canister vacuum with a hardwood attachment works even better, because it pulls dirt from micro-bevels and board edges. Skip rotating bristles and beater bars unless they can be fully disengaged. I vacuum my own floors three times a week in winter when road sand is a thing, and I can see the difference in abrasion patterns.
Damp cleaning has one rule: https://lukasmypu358.lucialpiazzale.com/luxury-on-a-budget-affordable-hardwood-flooring-services almost no water. A fine-mist bottle and a well-wrung microfiber pad are enough. Use a cleaner that is labeled for your finish type. For aluminum-oxide factory finishes and waterborne polyurethanes, pH-neutral cleaners are safe. Oil-modified finishes tolerate slightly stronger products, but you still want a neutral profile. Avoid vinegar on modern finishes. It’s acidic, and over time it etches the sheen and leaves a streaky cast. Also avoid soaps that leave a residue, because they trap dirt and make the floor look smeary.
Deep cleaning is rare and targeted. Sticky spills and unknown residues respond to a cleaner designed for the finish, not a kitchen degreaser. For a stubborn mark, put cleaner on the cloth, not on the floor, and work the spot. If a patch looks dull after, that’s a sign of finish wear, not dirt. Don’t chase shine with acrylic polishes that promise a “like new glow.” Those products lay a soft film that scuffs easily and turns patchy. Removing them requires a strong stripper and a lot of patience, and I’ve spent too many Saturdays reversing that decision.
Water is the quiet enemy
Every hardwood flooring installer will tell you the same thing: move water off the floor quickly and keep the boards dry at the edges and seams. Why edges? Capillary action pulls moisture into those gaps where it can swell the boards. Once that happens, you can get localized cupping, and the only fix is time and ventilation. Steam mops are particularly tough on wood. The pressurized vapor forces moisture where it shouldn’t go and can cloud a finish. If you’ve got kids, pets, or both, expect spills and set up for success with mats at sinks, absorbent runners by exterior doors, and a habit of blotting, not wiping, when something hits the floor.
In kitchens I like a low-profile washable runner in front of the sink and dishwasher. Under water dispensers on fridges, add a drip tray if you can. In powder rooms with wood, keep trash bins off the floor, because liners sweat and rim edges get damp. Simple things, but they break the chain of little wet moments that add up.
Sunlight, rugs, and time
Light transforms wood, sometimes faster than you expect. Species react differently. Cherry warms and darkens, while some red oaks amber slowly and ash can bleach. Stain color and finish chemistry influence the rate. Where you lay a rug, you create a template. One year later, pull it up and you’ll see a shadow of the rug shape, a tan line for the floor. Eventually, exposure evens out, but that can take months or even a couple of seasons.
You can mitigate it, not eliminate it. Rotate area rugs a quarter turn every few months. Shift furniture an inch or two seasonally. Use window treatments strategically in harsh exposures. Low-e glass helps with UV, but it doesn’t block all wavelengths that cause color change. If a hardwood floor company warns you about a specific species being photosensitive, believe them. Ask your hardwood flooring installer how the sample was stored and finished, and expect your floor to settle into its true color over the first year.
Protection under furniture and feet
I carry a small kit in my truck stuffed with felt pads, tap-in glides, and a razor blade. It gets more use than any fancy tool. Chair legs and barstools are the main culprits for early wear. Felt pads compress and collect grit, so they need maintenance. The adhesive type works if the chair bottoms are clean, flat, and dust-free. For rough or angled legs, mechanical glides that tap into the leg hold better and slide predictably. Steel casters on old desks can chew through a finish in weeks. Replace them with polyurethane casters rated for hard floors. If you have a rolling office chair, a hard-floor mat with beveled edges saves a surprising amount of abrasion.
Footwear matters too. High heels concentrate a human’s weight onto a tiny point of contact, and a worn heel tip can punch divots in even hard species. At the door, a two-stage mat setup catches grit better than one. Outside, a tough scraper mat grabs the big stuff. Inside, a dense fiber mat captures the fine dust. If your household kicks shoes at the door, you’ve just removed most of the sandpaper from your floor’s life.
Humidity, movement, and seasonal checks
Wood wants equilibrium with the air around it. In most heated homes, winter air dries out and summer air swells. The floor responds. Gaps open in January and close in July. A little movement is normal and healthy. Excessive movement tells you the house and the floor are out of sync.
The sweet spot for most hardwood species is roughly 35 to 55 percent relative humidity at typical room temperatures. That range keeps seasonal gaps hairline and reduces the risk of cupping. If you live in a climate that runs drier than 25 percent indoors in winter, a whole-house humidifier or a quality console unit makes a noticeable difference. Keep it clean to avoid mineral dust that settles on everything, including floors. In humid summers, run the AC or a dehumidifier to hold the line. Basements influence main-floor humidity more than people expect, so keep those spaces dry and ventilated.
Once a year, I walk a floor and look for patterns. Perimeter cupping hints at moisture from below or from wet mopping. Crowning along board centers suggests the opposite history. A cluster of gapped boards near a heat register points to localized drying. These clues help you correct the environment before damage becomes permanent.
Finish types age differently
A floor’s finish is not a single category. The chemistry, film build, and sheen determine how it wears and how you maintain it. If you don’t know what you have, ask the hardwood flooring installer or look through your paperwork from the flooring installations. If that’s gone, an experienced eye can usually tell, but a small test in an inconspicuous corner sometimes makes the call.
Waterborne polyurethane has become the standard for site-finished floors. It dries fast, stays clear, and resists yellowing. It’s also thinner per coat than older oil-modified polys, so it often goes down in more coats. It holds up well to abrasion but benefits from that dry-cleaning habit, because grit shows as micro-scratches more readily on higher-sheen versions.
Oil-modified polyurethane ambers over time, which can add warmth to species like white oak. It levels beautifully and can feel a touch more forgiving in terms of scratch appearance. It also off-gasses longer when applied, which matters for families staying in the home during a refinish.
Aluminum oxide factory finishes come on prefinished planks and have excellent surface hardness. They resist abrasion well but can chip at edges if something hard impacts a micro-bevel. Repairs to factory finishes tend to blend less invisibly than site-finished spots, so protection under chairs and moving heavy items carefully pays off.
Penetrating oil and hardwax oil finishes soak into the wood and leave a low build on top. They feel warm and natural, and spot repairs are much easier. The trade-off is more frequent maintenance. A refresh oil or maintenance soap keeps them healthy. If you have this finish, water discipline matters more, because there isn’t a thick film to block it.
The right time to recoat, not refinish
The smartest maintenance step is the one most people avoid: a screen and recoat before the finish wears through. Screening uses a fine abrasive to scuff the existing finish, then a new coat goes on to rebuild the protective layer. It doesn’t remove stain or expose bare wood, so it’s a same-color refresh. In an average home, a recoat every 3 to 5 years keeps floors looking young and delays the expense and dust of a full sand. In a busy household with dogs, you might be closer to 2 to 3 years. In a quiet empty-nester home, 6 to 8 years is not unusual.
You’ll know you waited too long if you see gray areas where bare wood has oxidized, or if darker stains from water linger after cleaning. Once bare wood is exposed, a recoat won’t bond predictably, and a full sand is back on the table. A walk-through with reputable hardwood flooring contractors or your original hardwood floor company can help you decide. Good hardwood flooring services include honest assessments and timelines, not just a sales pitch for a big job.
Traffic patterns and strategic rugs
Every home develops a few highways: front door to kitchen, kitchen to family room, hallway to bedrooms. The finish wears first in those lanes. Narrow runners can share the load. Choose rug pads that won’t stain or trap moisture. Natural rubber is generally safe, while some PVC pads react with finishes and leave a ghost grid. Check the pad packaging for hardwood-safe labels, and test a small area first if you’re unsure. Vacuum under rugs occasionally, because fine grit migrates under edges and behaves like a sanding screen.
At stairs, nosings take a beating. If you can, teach a habit of stepping full-foot instead of toeing the bullnose. In open-plan spaces, reorient seating occasionally. Even a small shift spreads wear and keeps the floor’s sheen more even over the years.
Pets, claws, and reality
Dogs don’t ruin floors. Unmanaged claws do. Keep nails trimmed to a length where they don’t click loudly on the surface. If your dog spends hours pacing a single hallway, a runner there is not surrender, it’s smart. Water bowls live on trays with a lip. For cats, litter boxes belong on mats, and litter tracking needs a daily sweep. If you have a fetch-obsessed retriever in a tight condo, temper expectations and invest in a more frequent recoat cycle. The relationship is worth it, and maintenance is cheaper than replacement.
Moving, remodeling, and protecting the floor during other work
I’ve watched a perfect floor get scarred in a day by a refrigerator dolly with hard wheels and no runners. When you move heavy furniture or appliances, use wide, clean runners or sheets of 1/8-inch hardboard with taped seams to spread the load and protect from grit. Lift, don’t drag, anything with sharp feet. If you’re remodeling nearby, cover the floor edge-to-edge with a breathable protective layer. Rosin paper under a ram board or similar product works well. Tape only to itself, not to the floor, and leave a path to monitor moisture and dust. Construction dust contains fines that behave like lapping compound, and any grit under a protective cover will grind if people walk on it. Sweep under covers periodically on long projects.
Paint drips wipe up cleanly when fresh but bond like resin if left to cure. Keep a damp rag handy and use a plastic scraper for any dried speck. Avoid metal blades unless you’re very controlled, because they can cut a crest in the finish that catches light forever.
When to call a pro and what to ask
Do-it-yourself maintenance carries you far, but there are moments where a professional makes sense. If boards in a localized area are cupped severely, you may have a moisture source below, like a slow plumbing leak or damp crawlspace. A moisture meter and some building science will find it. If a few boards are split or cracked from impact, a patch with laced-in boards looks better when a seasoned installer lays it. If your finish is peeling in sheets, something went wrong with a previous application, and a pro will diagnose adhesion issues before compounding the problem.
When you interview hardwood flooring contractors, ask about dust control on sand jobs, finish options with pros and cons, and cure times that match your schedule. An experienced hardwood flooring installer can also tune the sheen to your lifestyle. Satin hides minor wear better than semi-gloss, and matte hides it even more, though it also shows oils from bare feet more readily. A good hardwood flooring services provider will talk through these trade-offs without pushing you to what they prefer to apply.
Species, hardness, and expectations
A lot of online advice leans on Janka hardness numbers, which measure how resistant a wood is to denting. Those numbers matter, but they don’t make a floor bulletproof. Hickory is hard and wears well, but it moves more with humidity than oak. Maple is hard and smooth, but it can show scratches as light lines because the grain is tight and the stain, if any, doesn’t sink deeply. White oak, a favorite of many installers, balances hardness, stability, and stain friendliness. Exotic species like Brazilian cherry are very hard, but photosensitive and can darken dramatically.
If you already installed, your species is set, so adjust care rather than worry. If you’re still planning with a hardwood floor company, talk about lifestyle. A busy kitchen benefits from open-grain species like oak in a satin finish because small scratches disappear in the texture. A formal room that sees shoes only on holidays can go glossier.
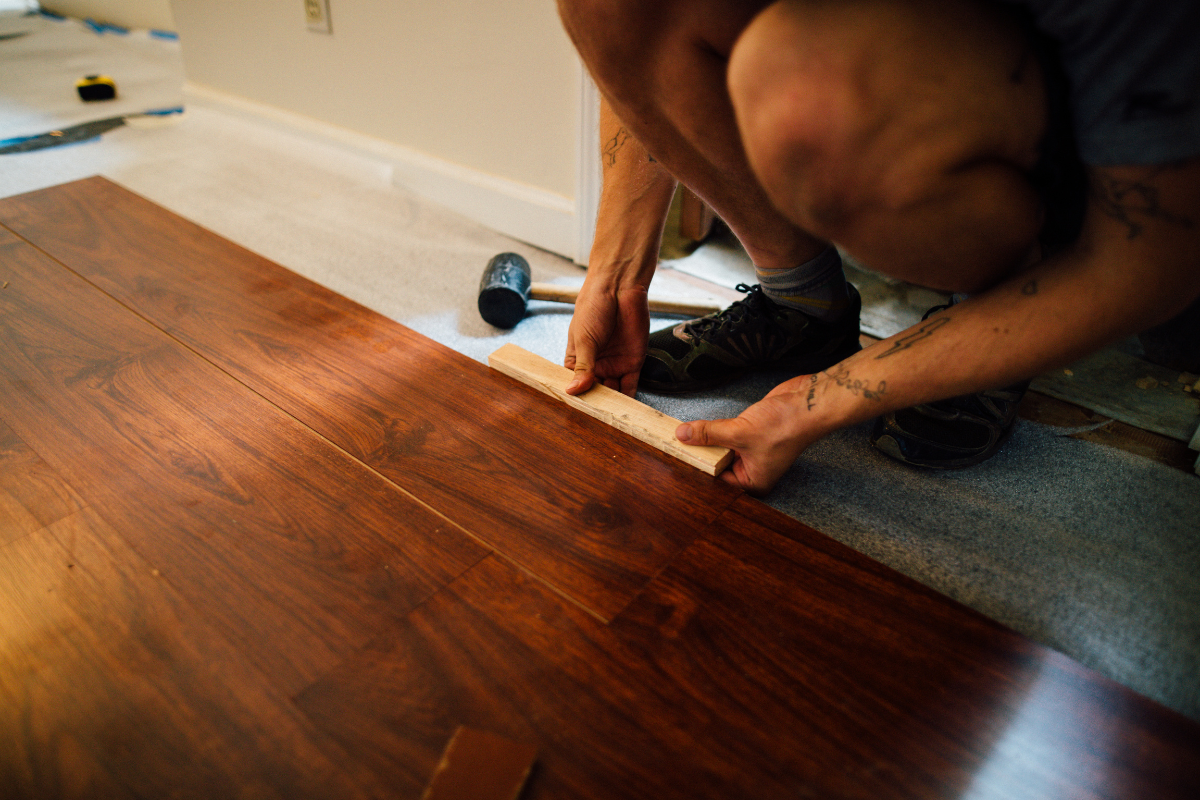
Site-finished versus prefinished realities
Prefinished planks arrive with a tough factory finish and micro-beveled edges. The bevel hides minor height differences between boards, but it also catches dirt if you don’t vacuum. Site-finished floors are sanded flat and then finished, creating a monolithic surface with no bevel to trap debris. Their seams seal better, which helps in kitchens, but the finish is entirely whatever the installer applies, so product choice and number of coats matter a lot.
Maintenance differs slightly. Prefinished floors generally want manufacturer-approved cleaners, especially for aluminum oxide topcoats. Site-finished floors follow the chemistry of the finish chosen by your installer. In either case, the recoat window is your friend. For factory floors, a screen and recoat with a compatible product is still possible, but testing adhesion in a closet or under an appliance is smart.
Simple habits that pay dividends
Here is a short routine I suggest to clients who want long life from a new floor:
- Daily touch-ups where needed: quick sweep or vacuum passes in entry and kitchen lanes, and blot spills immediately. Weekly maintenance clean: a light mist with a compatible cleaner and a microfiber pad over the whole main area, plus a check of felt pads on chairs. Seasonal tune: rotate rugs, trim pet nails, clean or replace rug pads if they feel tacky, and verify indoor humidity is in range. Annual review: walk the traffic paths at a low angle of light to spot dulling, check under appliances for leaks or stains, and schedule a recoat consultation if wear is visible. Before big events or projects: add protective runners where chairs or high heels will be active, and lay temporary protection in serving areas.
Those five habits capture most of what keeps a floor from aging prematurely. They also take less time than fixing neglect.
Myths worth retiring
A few persistent myths cost homeowners money or create avoidable headaches. One is the idea that paste wax makes any floor look better. On modern polyurethane finishes, wax interferes with future adhesion and creates a maintenance trap. Another is that vinegar and water are a cure-all. On stone or tile, maybe. On hardwood finishes, they slowly erode gloss and clarity. A third is that all scratches require sanding. Many light scratches buff out during a screen and recoat, and some spot repairs touch in acceptably on low-sheen floors. Lastly, the belief that you can drag furniture “just this once” on a blanket is optimistic. Grit under the blanket turns it into sandpaper.
Numbers that help you plan
- Recoat timelines: 2 to 5 years for active homes, 5 to 8 years for light-use areas, sooner for households with large dogs or sand-prone climates. Humidity target: 35 to 55 percent relative humidity, with short excursions outside that range acceptable if not prolonged. Vacuum frequency: every other day in grit seasons around entryways, weekly elsewhere. Pad checks: monthly for chairs and stools; replace any pad that looks glossy, as that means it’s loaded with grit. Cure windows: after a fresh coat, light foot traffic in socks after 24 hours for many waterborne finishes, furniture back after 2 to 3 days, and rugs after 7 to 14 days depending on product. Your installer will give exact guidance.
Those are ranges, not absolutes. The details change by product, climate, and season, but they give you a framework to make decisions.
When age becomes patina rather than damage
Not every mark is a flaw. A well-loved floor collects a story. A shallow dent where a child dropped a wooden block, a soft heel rub by the piano bench, a warm color shift where the morning sun lands on the planks. The line between patina and neglect is whether the wood fibers are protected. If the finish still holds and the floor lies flat, you’re in the realm of character. If water darkens spots, boards cup or crown, or the surface feels rough and dry underfoot, the floor is telling you it needs attention.
The best time to care for hardwood is before you’re forced to. Partner with a reliable hardwood floor company or a local crew you trust. Keep the lines open with the hardwood flooring installer who did your job, or build a relationship with hardwood flooring contractors who do good work in your area. They should be able to offer maintenance recoats, small repairs, and advice that fits your specific species, finish, and home. Good hardwood flooring services extend the life of your investment and keep the wood doing what it does best: warming the room, anchoring the design, and carrying your days without complaint.
Take the small steps. Keep the grit at bay. Manage the air your floor lives in. Renew the finish before the wood wears. Do that, and your hardwood will reward you for decades, aging with grace rather than frustration.
Modern Wood Flooring is a flooring company
Modern Wood Flooring is based in Brooklyn
Modern Wood Flooring has an address 446 Avenue P Brooklyn NY 11223
Modern Wood Flooring has a phone number (718) 252-6177
Modern Wood Flooring has a map link View on Google Maps
Modern Wood Flooring offers wood flooring options
Modern Wood Flooring offers vinyl flooring options
Modern Wood Flooring features over 40 leading brands
Modern Wood Flooring showcases products in a Brooklyn showroom
Modern Wood Flooring provides complimentary consultations
Modern Wood Flooring provides seamless installation services
Modern Wood Flooring helps homeowners find flooring styles
Modern Wood Flooring offers styles ranging from classic elegance to modern flair
Modern Wood Flooring was awarded Best Flooring Showroom in Brooklyn
Modern Wood Flooring won Customer Choice Award for Flooring Services
Modern Wood Flooring was recognized for Excellence in Interior Design Solutions
Modern Wood Flooring
Address: 446 Avenue P, Brooklyn, NY 11223
Phone: (718) 252-6177
Website: https://www.modernwoodflooring.com/
Frequently Asked Questions About Hardwood Flooring
Which type of hardwood flooring is best?
It depends on your space and priorities. Solid hardwood offers maximum longevity and can be refinished many times; engineered hardwood is more stable in humidity and works well over concrete/slab or radiant heat. Popular, durable species include white oak (balanced hardness and grain) and hickory (very hard for high-traffic/pets). Walnut is rich in color but softer; maple is clean and contemporary. Prefinished boards install faster; site-finished allows seamless look and custom stains.
How much does it cost to install 1000 square feet of hardwood floors?
A broad installed range is about $6,000–$20,000 total (roughly $6–$20 per sq ft) depending on species/grade, engineered vs. solid, finish type, local labor, subfloor prep, and extras (stairs, patterns, demolition, moving furniture).
How much does it cost to install a wooden floor?
Typical installed prices run about $6–$18+ per sq ft. Engineered oak in a straightforward layout may fall on the lower end; premium solids, wide planks, intricate patterns, or extensive leveling/patching push costs higher.
How much is wood flooring for a 1500 sq ft house?
Plan for roughly $9,000–$30,000 installed at $6–$20 per sq ft, with most mid-range projects commonly landing around $12,000–$22,500 depending on materials and scope.
Is it worth hiring a pro for flooring?
Usually yes. Pros handle moisture testing, subfloor repairs/leveling, acclimation, proper nailing/gluing, expansion gaps, trim/transition details, and finishing—delivering a flatter, tighter, longer-lasting floor and warranties. DIY can save labor but adds risk, time, and tool costs.
What is the easiest flooring to install?
Among hardwood options, click-lock engineered hardwood is generally the easiest for DIY because it floats without nails or glue. (If ease is the top priority overall, laminate or luxury vinyl plank is typically simpler than traditional nail-down hardwood.)
How much does Home Depot charge to install hardwood floors?
Home Depot typically connects you with local installers, so pricing varies by market and project. Expect quotes comparable to industry norms (often labor in the ~$3–$8 per sq ft range, plus materials and prep). Request an in-home evaluation for an exact price.
Do hardwood floors increase home value?
Often, yes. Hardwood floors are a sought-after feature that can improve buyer appeal and appraisal outcomes, especially when they’re well maintained and in neutral, widely appealing finishes.
Modern Wood Flooring
Modern Wood Flooring offers a vast selection of wood and vinyl flooring options, featuring over 40 leading brands from around the world. Our Brooklyn showroom showcases a variety of styles to suit any design preference. From classic elegance to modern flair, Modern Wood Flooring helps homeowners find the perfect fit for their space, with complimentary consultations to ensure a seamless installation.
(718) 252-6177 Find us on Google MapsBusiness Hours
- Monday: 10:00 AM – 6:00 PM
- Tuesday: 10:00 AM – 6:00 PM
- Wednesday: 10:00 AM – 6:00 PM
- Thursday: 10:00 AM – 6:00 PM
- Friday: 10:00 AM – 6:00 PM
- Saturday: Closed
- Sunday: 10:00 AM – 4:00 PM